 Achiever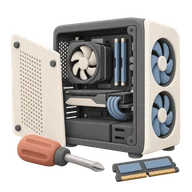
Hardware Customizer
40 pointsHobbies & Creativity
Open up, modify, or build your own electronic hardware (keyboard, PC, or pedal).
How to complete Hardware Customizer
This means physically opening a device and changing what's inside (swapping switches in a keyboard, upgrading RAM or a GPU in a PC, or wiring a guitar pedal) rather than just using it as shipped. Doing it once removes the fear of the screwdriver and turns hardware from a black box into something you own and control.
- Pick the simplest project you actually want: a hot-swap mechanical keyboard, a RAM or SSD upgrade, or a kit-based effects pedal.
- Look up a teardown or build guide for your exact model on iFixit, YouTube, or the manufacturer's manual before touching anything.
- Gather the right tools: usually a precision screwdriver set, plastic spudger, and an anti-static wrist strap for PC internals.
- Power down and unplug, then work on a clear non-carpet surface, keeping screws sorted in a tray or magnetic mat by where they came from.
- Make your change, reassemble, and power on to confirm it boots and the modified part works.
Tips
- Photograph each step as you disassemble so reassembly is just running the photos in reverse.
- Discharge static by touching bare metal before handling boards; for soldering pedals, tin the iron and tack one joint at a time.
- Hot-swap keyboards need no soldering (pull switches straight up with a puller), which makes them the lowest-risk entry point.
What counts as done
You've reassembled the device and it powers on and functions with your modification in place: new switches typing, more RAM detected, or the pedal passing signal.
40
points awarded
—
raritysoon
Track this achievement
Sign up for free and start earning points for real-life milestones.
Start trackingRecently completed by
More Hobbies & Creativity

The Green Thumb
Grow a vegetable from seed to harvest and eat what you grew.
35 points

Game Master
Host and run a full tabletop RPG session as the Game Master.
30 points

Photo Archive
Organize and sort your collection of physical or digital photos by year and event.
20 points

Carver
Use manual carving or whittling tools to shape a raw wooden object into a new form.
25 points

Growing Audience
Reach a milestone of 1,000 followers or subscribers on your primary platform.
65 points
Vintage Harvest
Visit a vineyard and participate in a formal wine-tasting flight.
15 points