 Achiever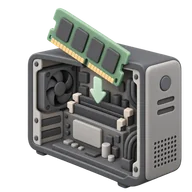
The Hardware Upgrade
35 pointsDigital Hygiene
Open up your computer and upgrade a component yourself (RAM, SSD, or GPU) for a real speed boost.
How to complete The Hardware Upgrade
A 40-dollar RAM stick or SSD often does more for a sluggish machine than a whole new computer would, and installing it yourself takes an evening. Once you have opened the case and seen how little is in there, hardware stops being scary forever.
- Find the actual bottleneck: open Task Manager or Activity Monitor. Memory constantly full means RAM; slow boots and loading on a spinning disk mean SSD; low frame rates in games mean GPU.
- Check compatibility with Crucial's advisor tool or your machine's service manual: DDR generation and max RAM, drive form factor (2.5-inch SATA vs M.2 NVMe), PSU wattage and case length for a GPU.
- Watch a teardown video for your exact model before ordering anything; some thin laptops have soldered RAM and cannot be upgraded.
- Shut down, unplug, hold the power button ten seconds, then touch bare metal on the case to discharge static before touching parts.
- Seat the component firmly: RAM goes in at an angle and clicks flat, M.2 drives screw down. Reassemble and boot.
- Verify the new part shows up in system information; for an SSD, clone your old drive first or do a fresh OS install.
Tips
- Photograph each step of disassembly so reassembly is trivial.
- If new RAM is not detected, reseat it; poor seating causes nearly all first-boot failures.
- iFixit rates repair difficulty per model, so check yours before buying.
What counts as done
Your machine boots, system information reports the new component, and you can measure or clearly feel the speed difference.
35
points awarded
—
raritysoon
Track this achievement
Sign up for free and start earning points for real-life milestones.
Start trackingMore Digital Hygiene

Breach Check
Run your email addresses through a breach checker and change any compromised passwords.
10 points
Password Vault
Migrate your logins to a password manager and retire the three passwords you use everywhere.
30 points

The Update Day
Update the OS and every app on all your devices in one sitting. No more red badges.
10 points
App Graveyard
Delete every app you haven't opened in 6 months.
10 points

Inbox Zero
Get your inbox to zero unread emails. Archive, unsubscribe, breathe.
25 points
The Spam Call Blockade
Enable 'Silence Unknown Callers' to permanently end the era of telemarketing interruptions.
10 points